

Collection is a feature that assist sellers in organizing their products by certain themes, and they are used to maximize efficiency in the Store Decoration feature. A beautiful store will become more perfect when there are collections introducing the store’s outstanding products.
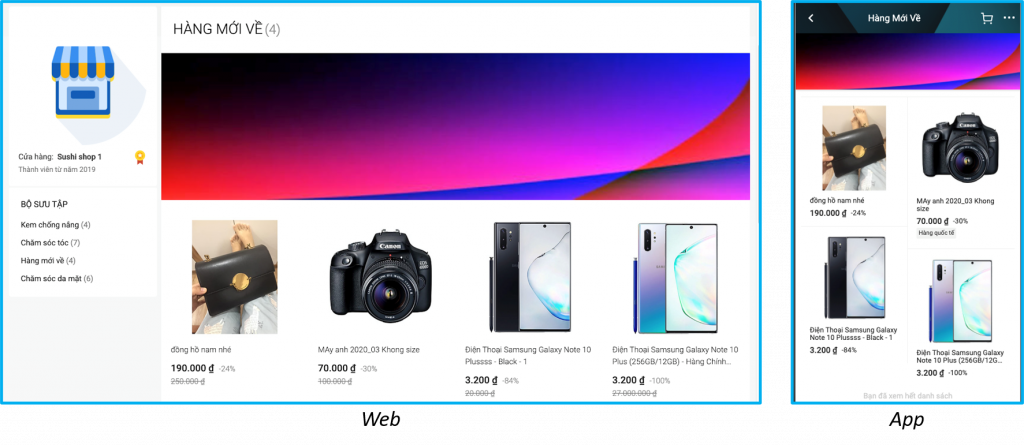
The collection is displayed in store page
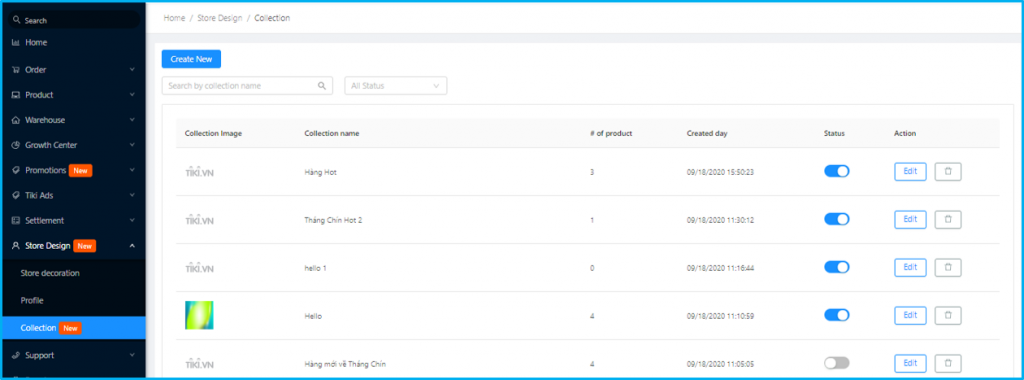
Collection management interface
Advantages:
Store page looks more professional and attractive.
Improve shopping experience.
Increase customer retention in your store.
Easily group products into collections for specific business purposes.
Efficient showcase of products in the store’s homepage with Store Decoration feature.
Collection images
The position of collections is ordered by created day – the more newly created collection, the closer to top it is. The position of collections in the store page will be displayed in the exact same order as in the Seller Center.
Easily drag and drop to change the position of products in a collection.
Search criteria: Only product with status on will be shown here, together with some other criteria:
SKU
Product name
Seller category
Brand
Price
I. Setting Collections
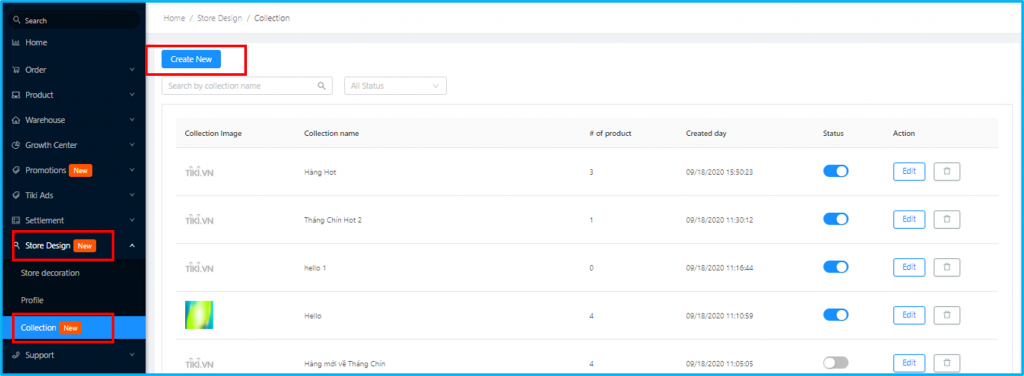
Step 1: Log in Seller Center, Choose “Store Design”, choose “Collection”, click “Create New” on the left screen.
Step 2: Fill General Information of Collection
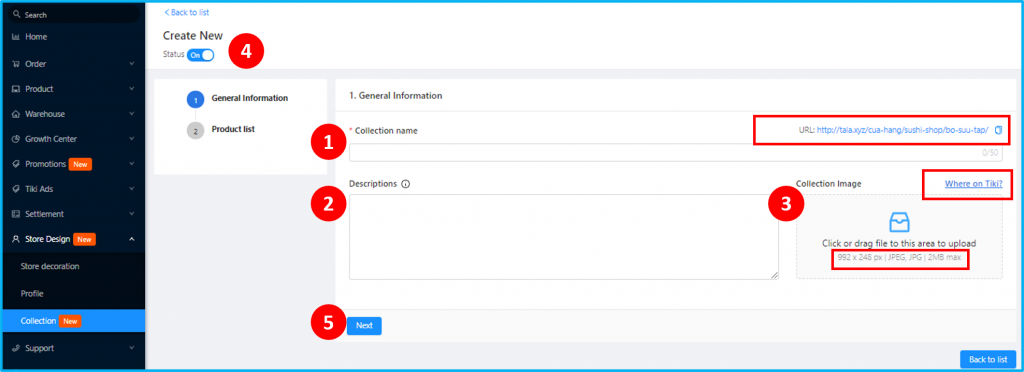
Details:
1. Collection Name: (required)
Note: A short and attractive name is highly recommended. The collection name will be automatically set into the URL link on the right, Sellers can use this link to promote.
2. Descriptions:
Sellers can fill in detailed information about the collection.
Sellers should use keywords in descriptions that increase the collection’s search visibility.
3. Collection Image:
Sellers can add a represented image of the collection here.
You can preview How this image displayed is on the session “Where on Tiki?” on the right corner.
Note: Image size has to be 992 x 248 px, in form JPEG/JPG and 2MB max.
4. Status:
5. Save:
Step 3: Create Product List of the collection
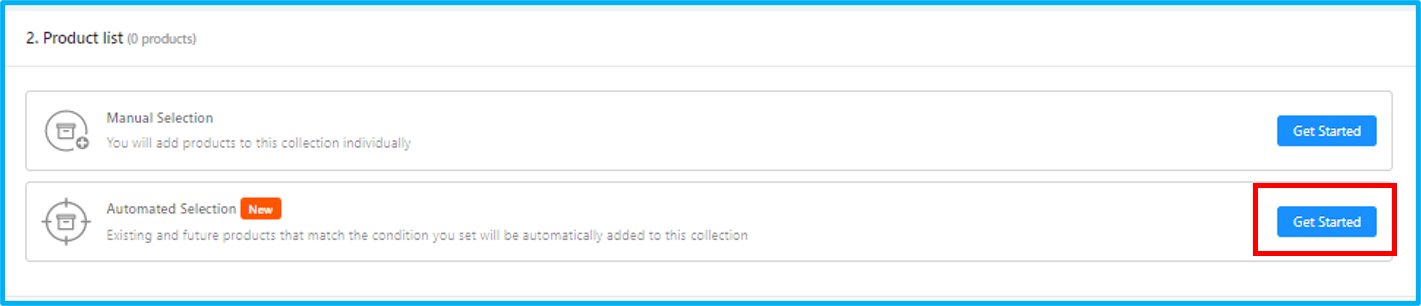
Sellers can choose form of collection, there is 2 form:
Manual Selection: Sellers will add products to this collection individually
Automated Selection: Existing and future products that match the condition you set will be automatically added to this collection.
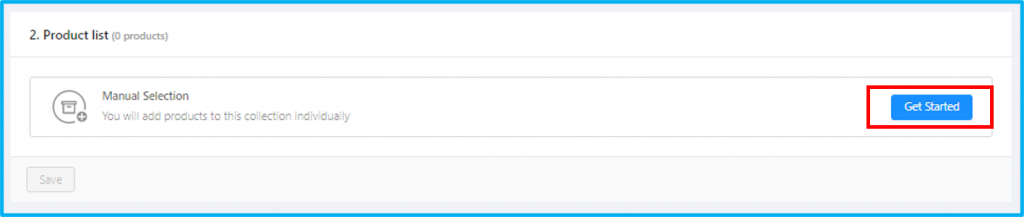
Step 3.1: Manual Selection
Step 3.1.1: Click on Get Started to add products
Step 3.1.2: Create Product List
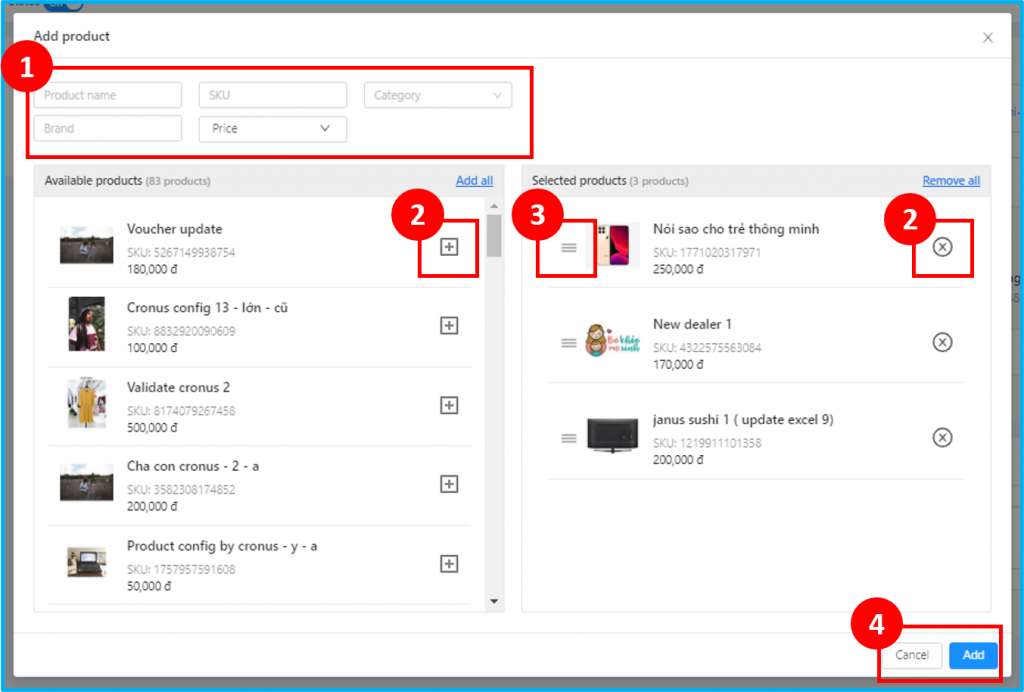
Details:
1. Searching Products to add them to collection, Seller can search by criteria:
Product name
SKU
Category
Brand
Price
2. Add/Remove products in list:
Add: Sellers pick the products in the left table by clicking on “+”.
Remove: Sellers remove the products in the right table by clicking on “x”.
Or Seller can Add all/Remove all products in the list at the right corner of each table.
3. Position of products in collection
4. Complete product list of collection by clicking on “Add”.
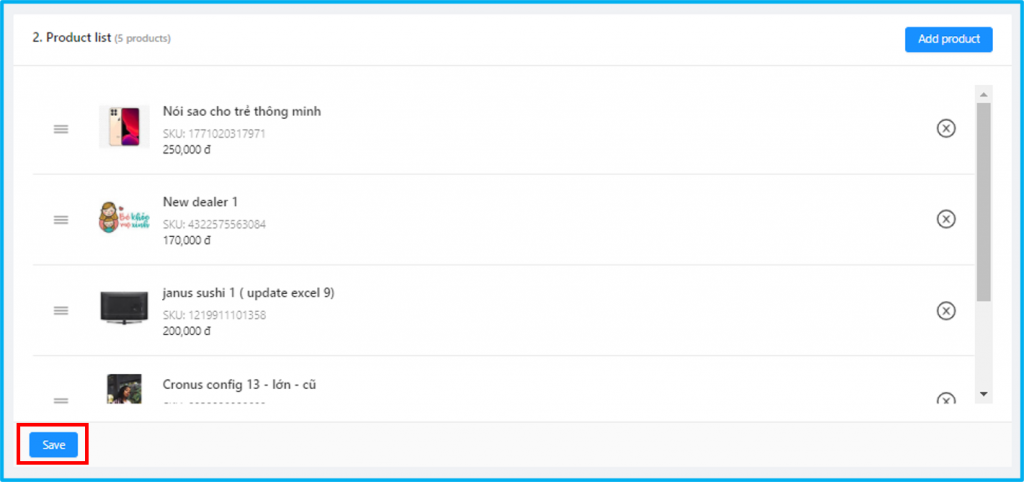
Step 3.1.3: Click on “Save” to complete collection creation.
Step 3.2: Automated Selection
Step 3.2.1: In “Automated Selection”, click “Get Started” to add products
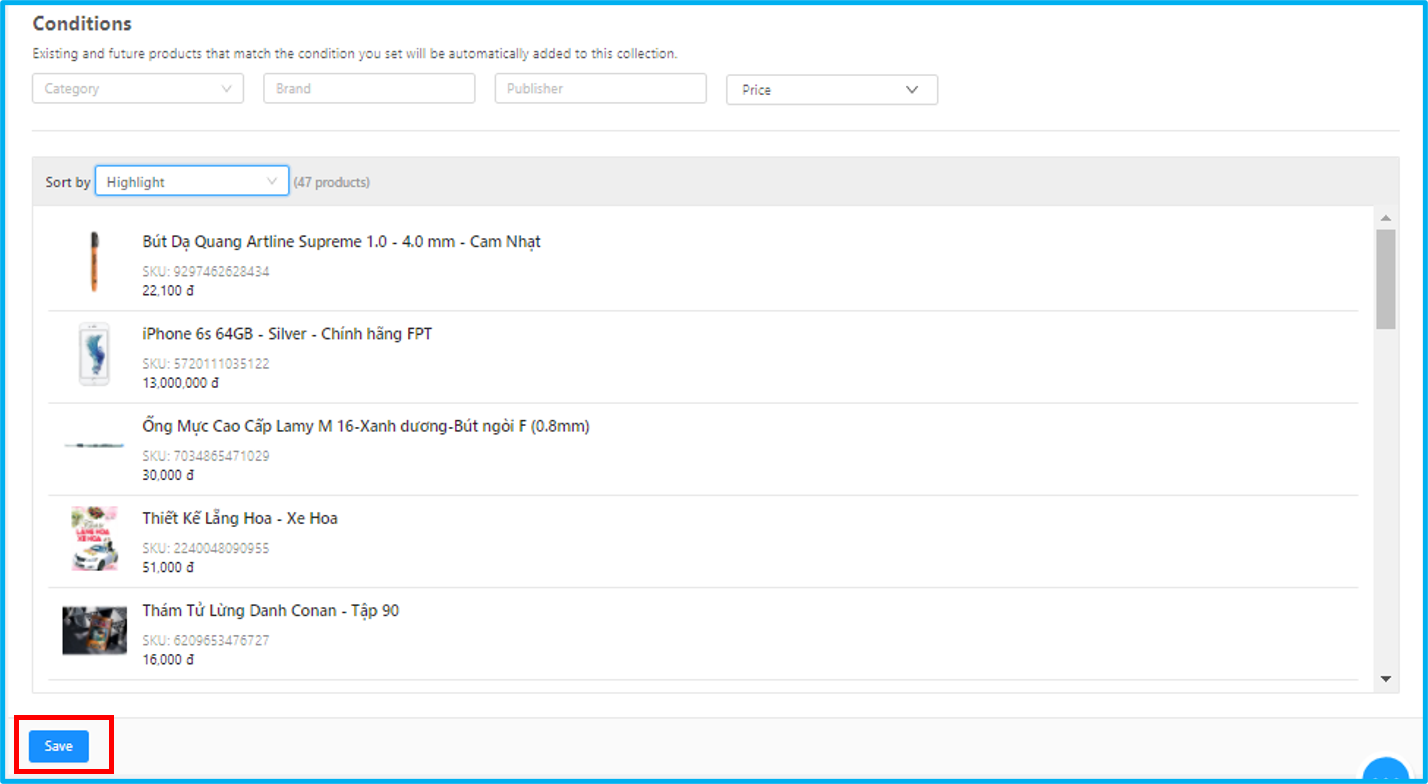
Step 3.2.2: Setting Conditions
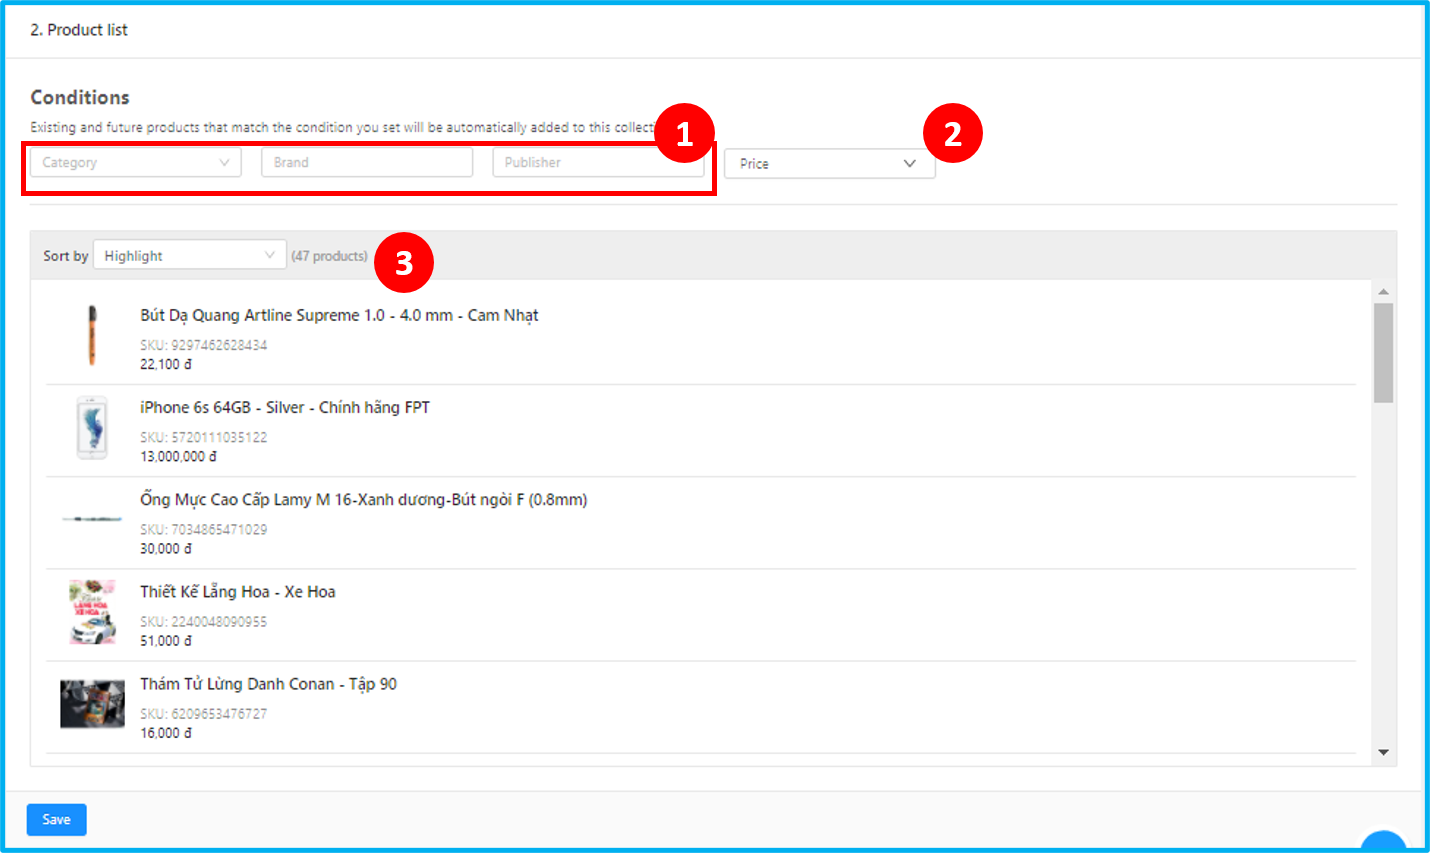
Details:
1. Setting conditions by Category:
Seller category level (up to level 3)
Brand
Publisher
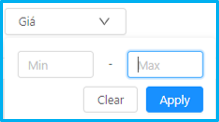
2. Setting conditions by Price:
Sellers can set min – max price condition to apply products.
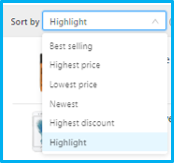
3. Setting position of product list
Sellers can arrange position of products by choosing sorting criteria as following
Step 3.2.3: Click on “Save” to apply conditions
II. Managing Collection
Sellers can search, check status, and edit collections in store in “Store Design”, choose “Collection”
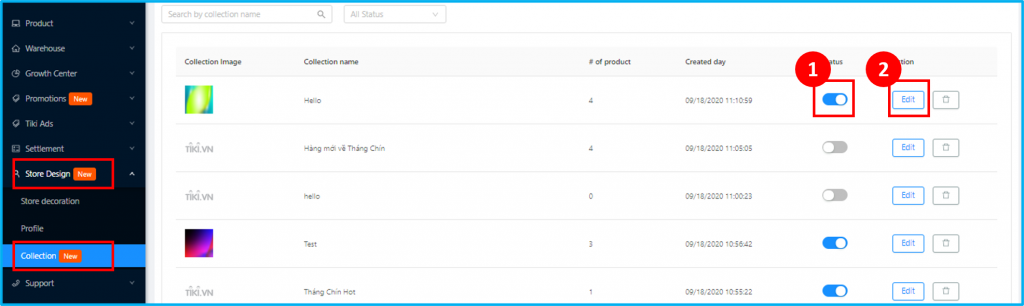
Status: Changing collection status by clicking on button “On/Off”
Action: Sellers can change details of collection by clicking on “Edit”.
Notes:
Collection with Manual Selection: Sellers can change collection general information, add/remove products.
Collection with Automated Selection: Sellers can only change conditions.