

Creating a new product interface has a lot of changes in both content and appearance, now, creating a new product is easier. Sellers need to do step by step as below:
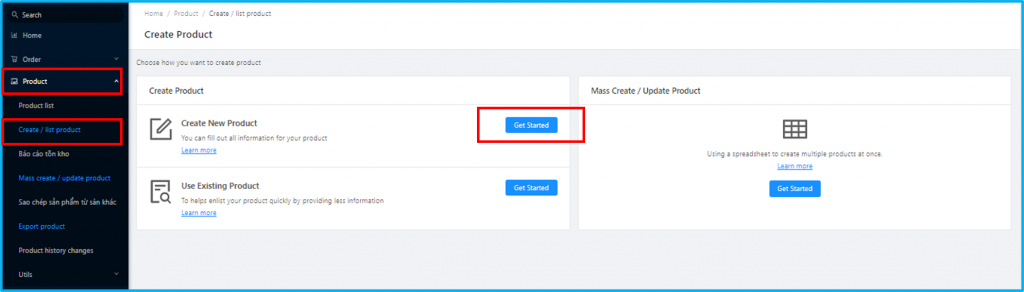
Step 1: At Product, choose Create/List product, in that screen Sellers click on Get Started in Create New Product section.
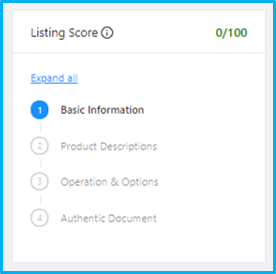
Step 2: Fill in information, including 4 sections:
Note:

1. Basic Information:
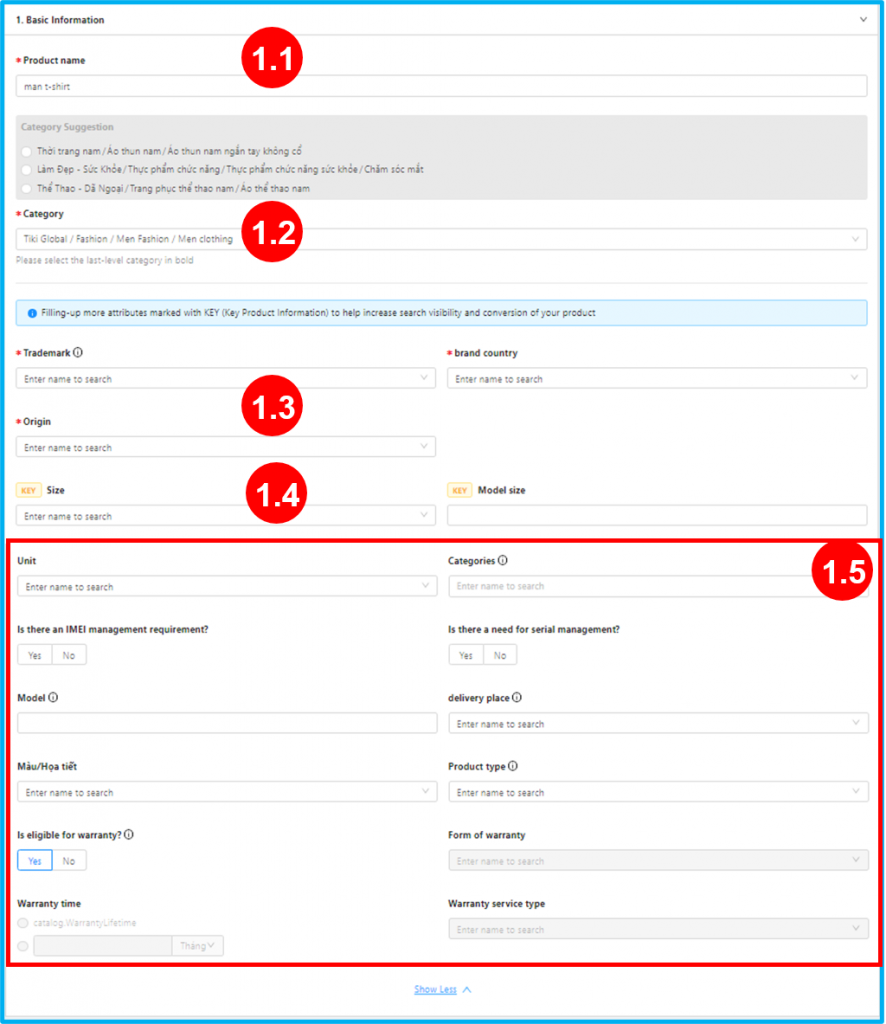
a. Required sections:
1.1 Product name: Sellers noted to name products in accordance with Tiki standard here.
1.2 Category: Your category will be suggested automatically based on the product name, Sellers must choose the product’s category correctly.

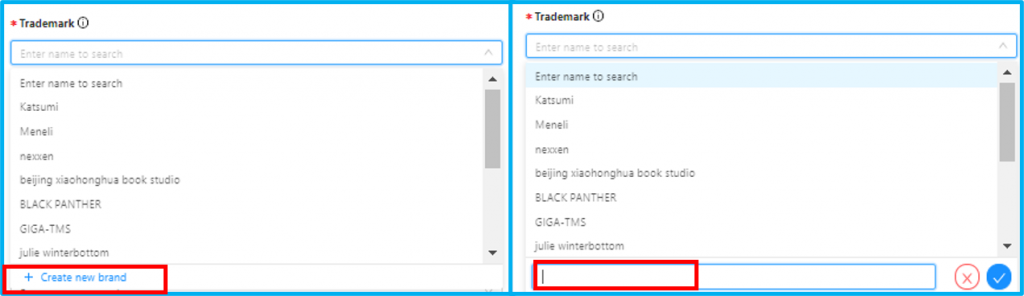
1.3 Trademark, Brand country, Origin: Sellers can search for the name or create a new one for these 3 sections.
Note:
Note: For Apple brand only, only sellers on the official Tiki approved list (based on Seller’s name or PIT code) can list products from this brand. Sellers who do not meet the requirements will not be able to upload documents in the Authentic Document section. Please contact our Partner Support Department for more details.
1.4 Size, Model Size: Sellers should fill-in all information that is marked by KEY to increase searching capability of products.
b. Not required sections: 1.5 include of:
Note: Warranty information: Global Sellers must choose No for this section.
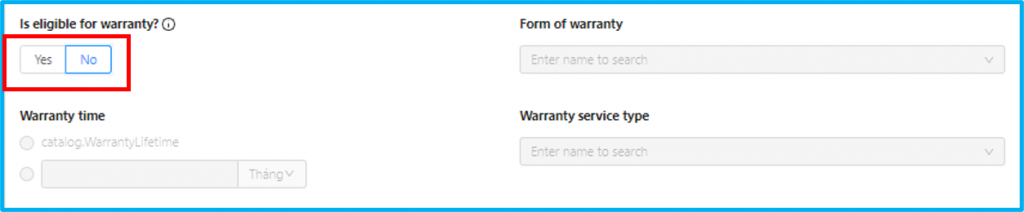
Sellers should fill-in all these information to increase the ability to convert into orders.
2. Product descriptions: 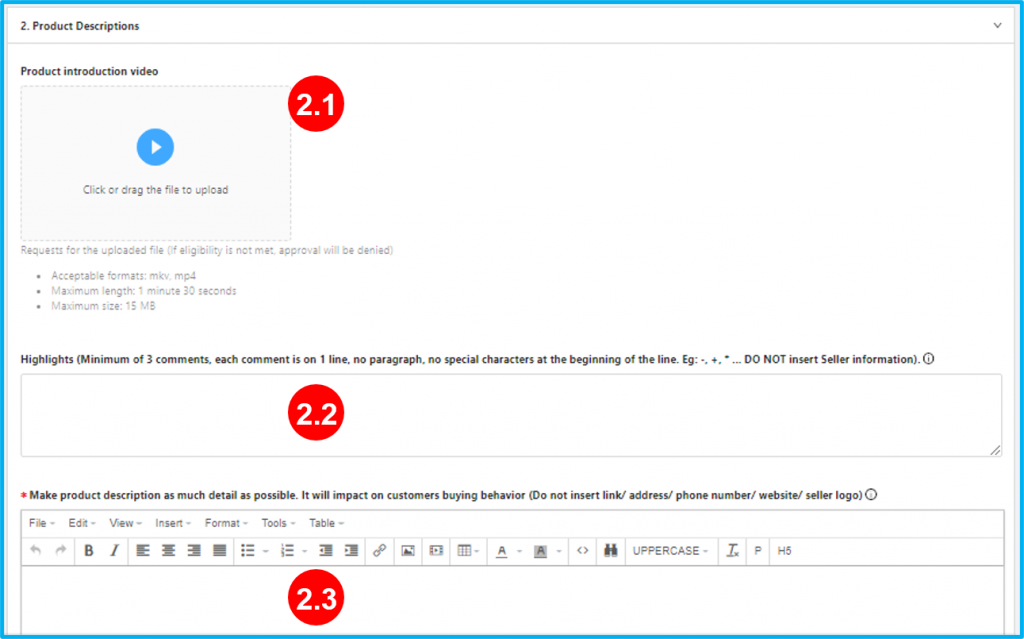
2.1 Product introduction video: This is a new feature, Sellers can add videos to help Customers have a better view of the product.
Note: Video must meet the requirements of the system. Learn more about image standard here
2.2 Highlights: Sellers should fill in all advantages of the product and use key-words to increase searchability
2.3 Product description: This is a required part, Sellers must fill in detailed information about the product.

All these sections will help to increase searchability, Sellers should fill-in as much details as you can.
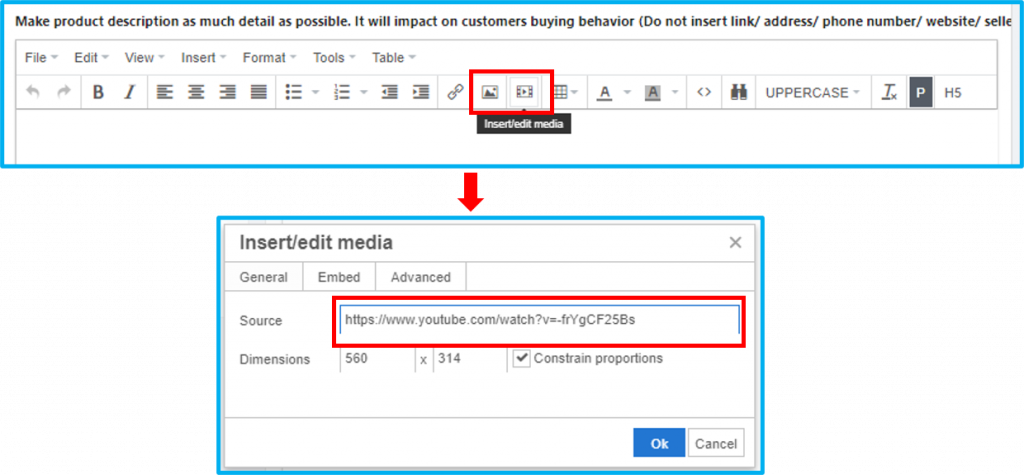 To insert video/picture, Sellers click on icon Media, then add a youtube link to insert video.
2.4 Material
2.5 Storage instructions
2.6 Storage / Laundry instructions
2.7 Model measurements
3. Operation and Options
3.1 Operation model:
At the Warehouse section, please choose the correct Warehouse where the products are located and at the Operation Model section, please select “CrossBorder” as shown below:

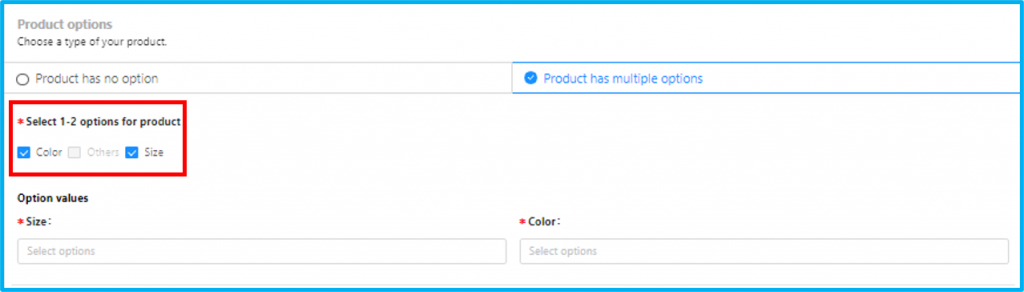
3.2 Product options: This is a new feature for products with multiple selections of basic attributes. In this section, Sellers have 3 options, when selecting products with multiple selections, screen will display as below:
3.3 Selling price: The selling price must not be less than 1,000 VND. For products with multiple options, the price of each option must not differ by more than 20%.
3.4 Product Code up to 255 characters, including only letters, numbers, hyphen “-“, underscore “_” and period “.”.
3.5 Product parameters: Sellers need to fill in the exact parameters for the convenience of packing and charging shipping fees.
3.6 Image: Sellers can add images of products, and should use more than 7 images with size 1000×1000 pixels
4. Authentic Document
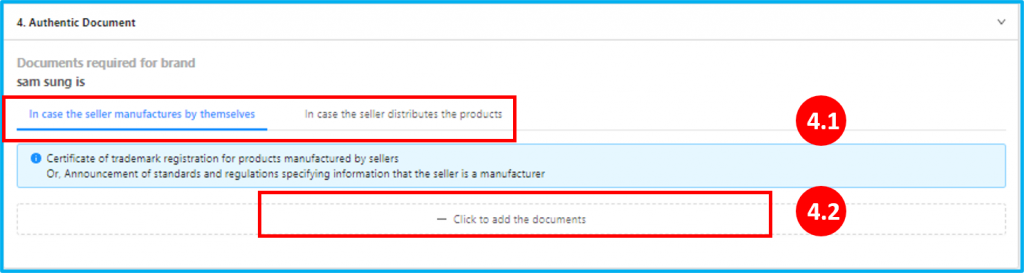
4.1 The Documents section is divided into 2 cases, on a case-by-case way to provide the types of documents:
The seller manufactures by themselves
The seller distributes the products
Note:
The seller should pay attention to the instructions of the system for each type of document.
For Apple brand only, only sellers on the official Tiki approved list (based on Seller’s name or PIT code) can list products from this brand. Sellers who do not meet the requirements will not be able to upload documents in the Authentic Document section. Please contact our Partner Support Department for more details.
If the product is an OEM, Seller no need to provide the authentic documents.
Step 3: Complete the listing process

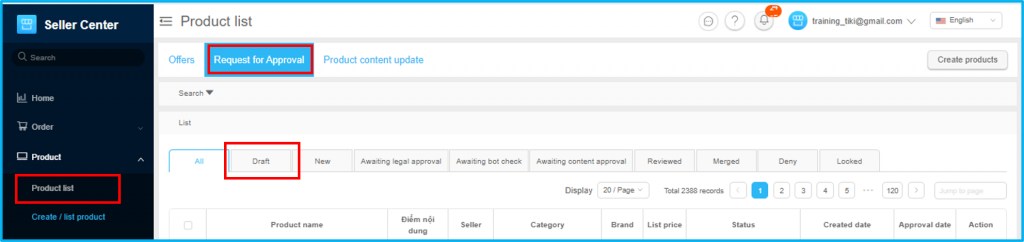
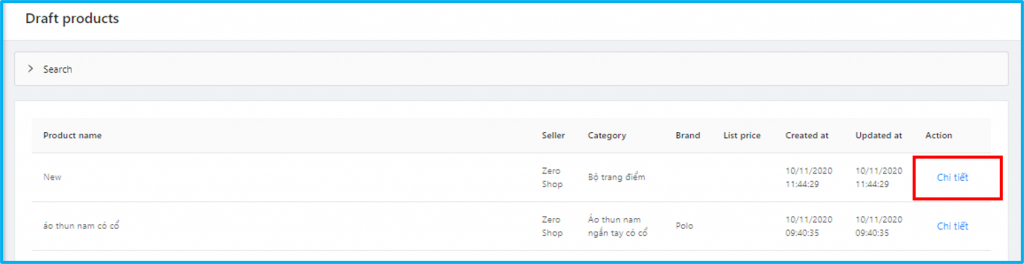
After filling in all information, Sellers click on Create to list products or click on Save draft to save the information and update later.
Step 1: At Product, choose Create/List product, in that screen Sellers click on Get Started in Use Existing Product section.
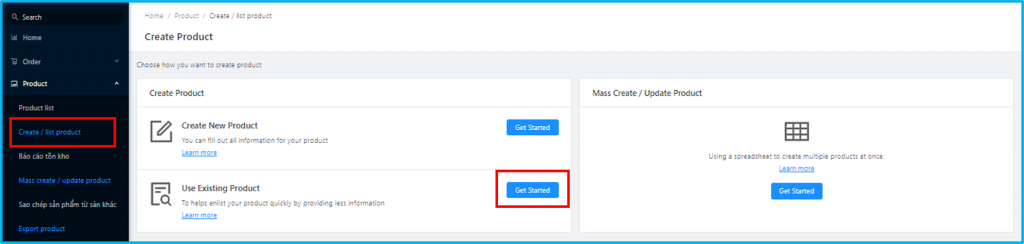
In this screen, Seller need to fill-in 3 sections: Existing Product, Operation information và Authentic Document
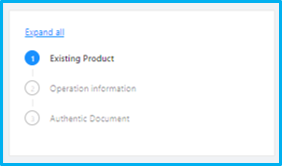
Step 2: Existing Product(s)
Step 2.1: Add product name to search the existing product

Step 2.2. Choose the existing product to list
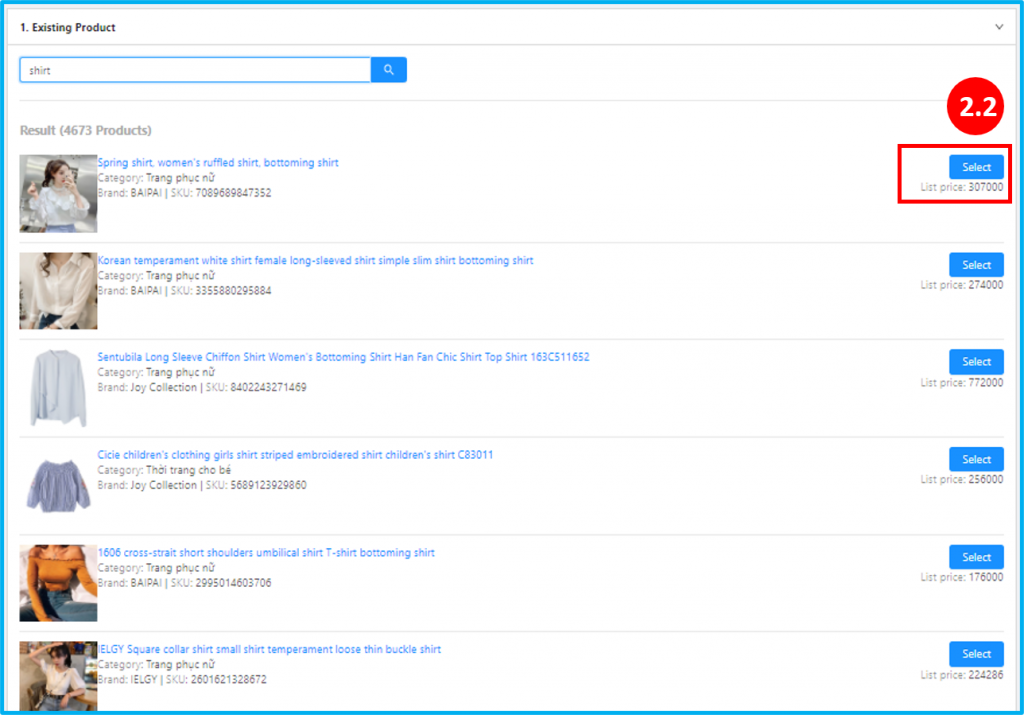
After searching, Sellers click on Select to list this existing product.
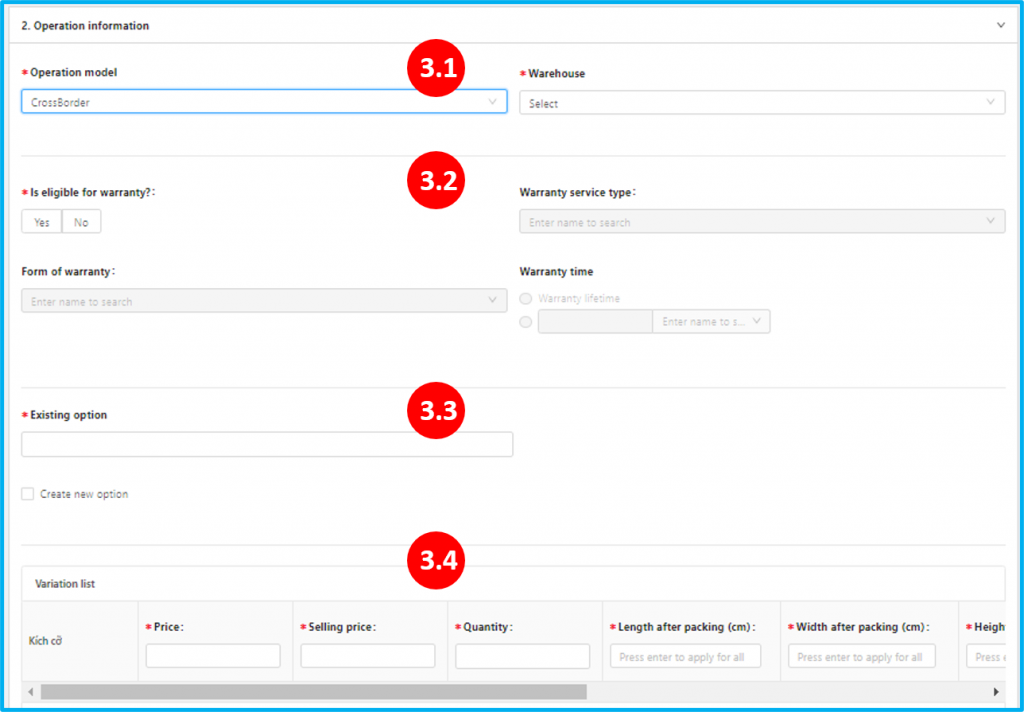
Step 3. Fill in Operation information of the product
Details:
3.1. Operation model & Warehouse
Please choose CrossBorder in the Operation model box and then select the Warehouse.
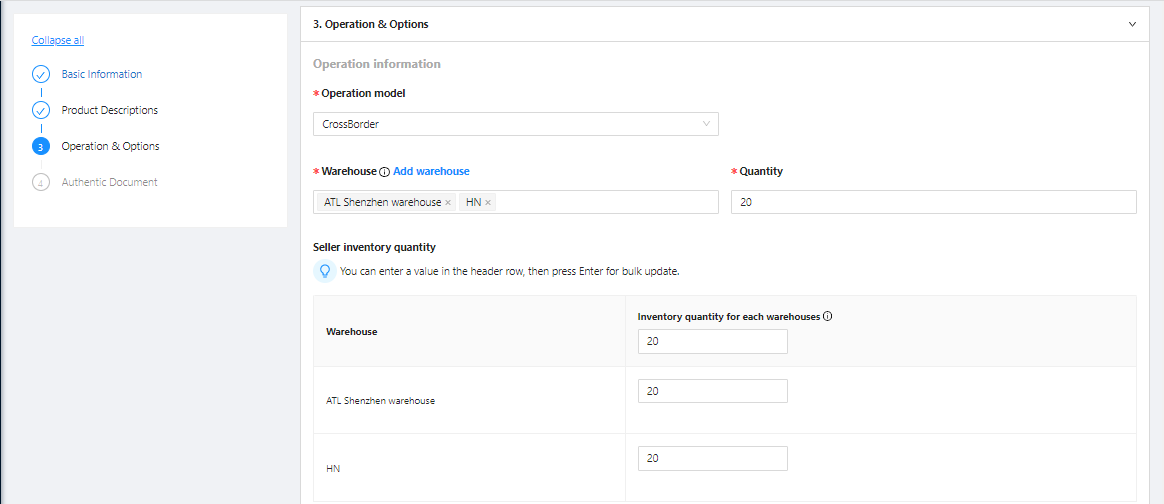
Please choose warehouses for this product and enter the inventory quantity for each warehouse.
Note: Quantity allowed for order = Quantity in stock for each warehouse – Quantity in process/ordered stock. Tiki calculates this number automatically based on the Seller’s inventory and the number of orders being processed.
Tip: Sellers can bulk update the stock at all warehouses by entering a value in the Enter number for all box and pressing Enter. This product quantity will be duplicated automatically across all selected warehouses.
Tiki expected to stop using the Inventory quantity attribute (the total inventory of all warehouses) in January 2022 and will instead use separate inventory numbers for each warehouse. As a result, if your products are sold at multiple warehouses, please kindly update the inventory quantity for each warehouse by January 4, 2022 to ensure smooth operation. Products that are only sold in one warehouse do not require any additional adjustments. In the event that there are too many products to update, Tiki recommends that you update the best-selling products first to ensure stable operation after January 4, 2022.
3.2. Warranty information.
Global Sellers choose No.
3.3. Multiple selection product
Sellers can choose available options or Create new options as below:
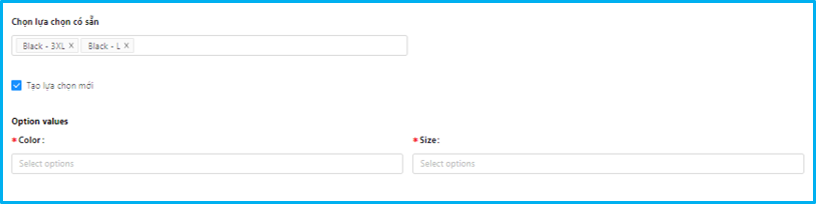
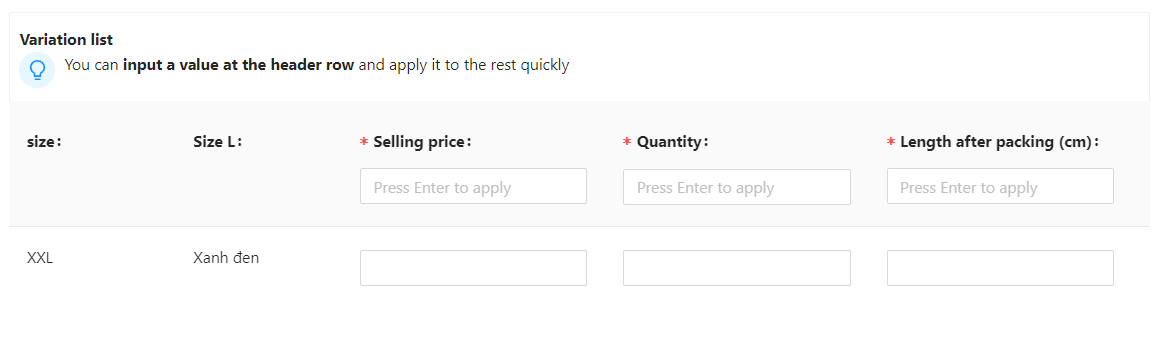
3.4. Setting price and parameters of products
The screen will display sections that need to fill-in information by the number of options set at section 3.3.
Step 4. Authentic Document

The Documents section is divided into 2 cases, on a case-by-case way to provide the types of documents:
The seller manufactures by themselves
The seller distributes the products
Note: The seller should pay attention to the instructions of the system for each type of
document.
If the product is an OEM, Seller no need to provide the authentic documents.
Step 5. Create product

After filling in all information, Sellers click on Create to list products or click on Save draft to save the information and update later.